
The Employee Records Module User Guide will assist individuals in successfully navigating through the system platform and completing required tasks. The Employee Records module serves to:
Note: This guide is current as of July 2020 and is subject to change. It will be updated as new PeopleAdmin modules are added and as changes are made to the system or processes.
One of the primary functions of Auburn’s Onboarding Center and Temporary Employment Services, or TES, is to assist new employees through the onboarding process.
Once a candidate has been selected and their hiring proposal has been finalized, a new employee will be assigned to an Onboarding or TES specialist (based on position type). The respective specialist will be responsible for facilitating actions that are needed by the employee to complete basic new hire processes.
There are no actions that are needed by the employee’s supervisor, departmental admin, or human resources liaison to initiate the onboarding process within the Employee Records module. However, there may subsequent tasks that a user is responsible for. Throughout this guide, it will be noted as to what user type will be responsible for various tasks and functions within the system.

1. To access the employee records module of PeopleAdmin, log in to your AU Access account.

3. After logging in, users will be directed to the Applicant Tracking System Welcome Page. You will need to navigate to the Employee Records Module from this page.
In the top left corner of your screen, click on the ellipsis.

4. A menu will appear that lists the various PeopleAdmin modules. To complete new hire onboarding actions, select the Employee Records Module. You can confirm that you are in the Records module by confirming that there is a “P Records” icon in the top left corner of the screen.
User groups are determined by each division’s HRL along with UHR. When accounts are requested, the requester may select the appropriate user group.
The Employment Services and Onboarding Center teams will review the user group requested to confirm the accuracy of the request. New users are uploaded through the PeopleAdmin applicant tracking system and are provided with appropriate access to the employee records module.
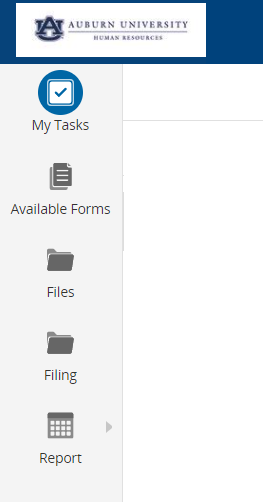
Features of the Employee Records Home Page:
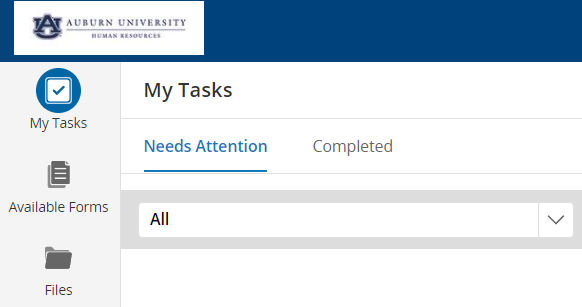
The Employee Records home page will open with an overview of your tasks. The red, “Needs Attention” tab shows the tasks that require actions on your behalf. The green, “Completed” tab shows tasks that you have processed.
If you complete a task and do not see it under the “Completed” tab, the document has likely continued through a workflow where you do not have access to it anymore. If you need to modify a document that you have submitted and cannot locate in the “Completed” tab, please contact your Onboarding Center or TES specialist.
You may use the search field to quickly locate a task in your task list.
The following columns will display in the tasks table.

There are two types of tasks: electronic forms (e-forms) and instructions.
To take action, click the button option (as specified above) under the Actions column. You may be prompted to complete a form, read instructions, or Sign/Approve/Review a document that has been submitted to you.
The corresponding task will appear. Once you have completed all required actions click the “Save Final” or “Submit” option at the bottom right corner of the document.
Some tasks are not associated with a form at all. These tasks will include a “Mark as Done” button next to them. When you have completed the appropriate tasks, simply click “Mark as Done” to remove it from your queue.

1. Under your My Tasks list, identify the document that you will process for the selected employee
2. Verify the task name and associated employee. When completing a document on behalf of an employee a “View” button will appear in the Actions column. Click the View button to open the document. The document will open in a pop up window.
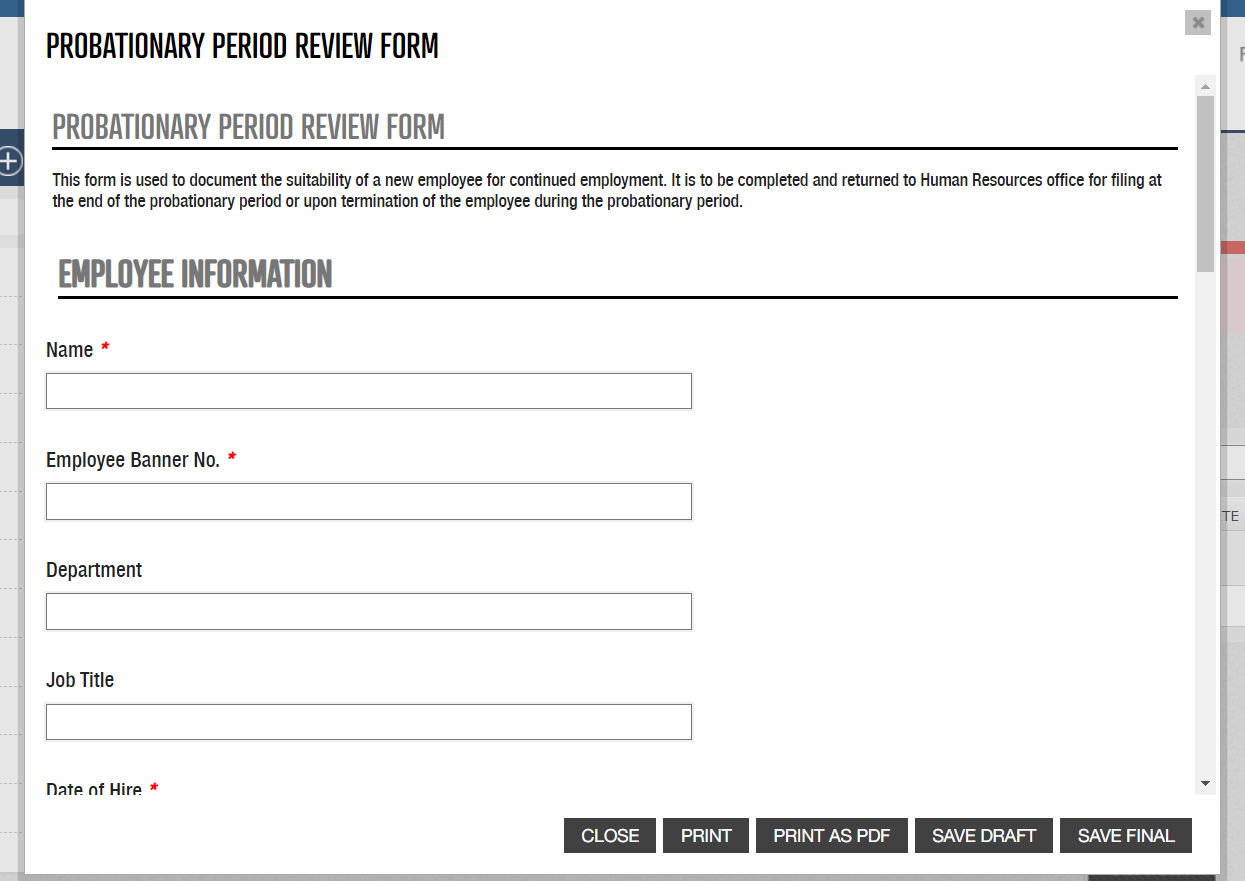
3. Complete the document in its entirety. Click "Save Final." If a signature is required, you will need to "Save Final" prior to accessing the signature field.

1. When processing an e-form that has been queued to you through a workflow, a “Sign/App/Rev” button will appear in the Actions column.
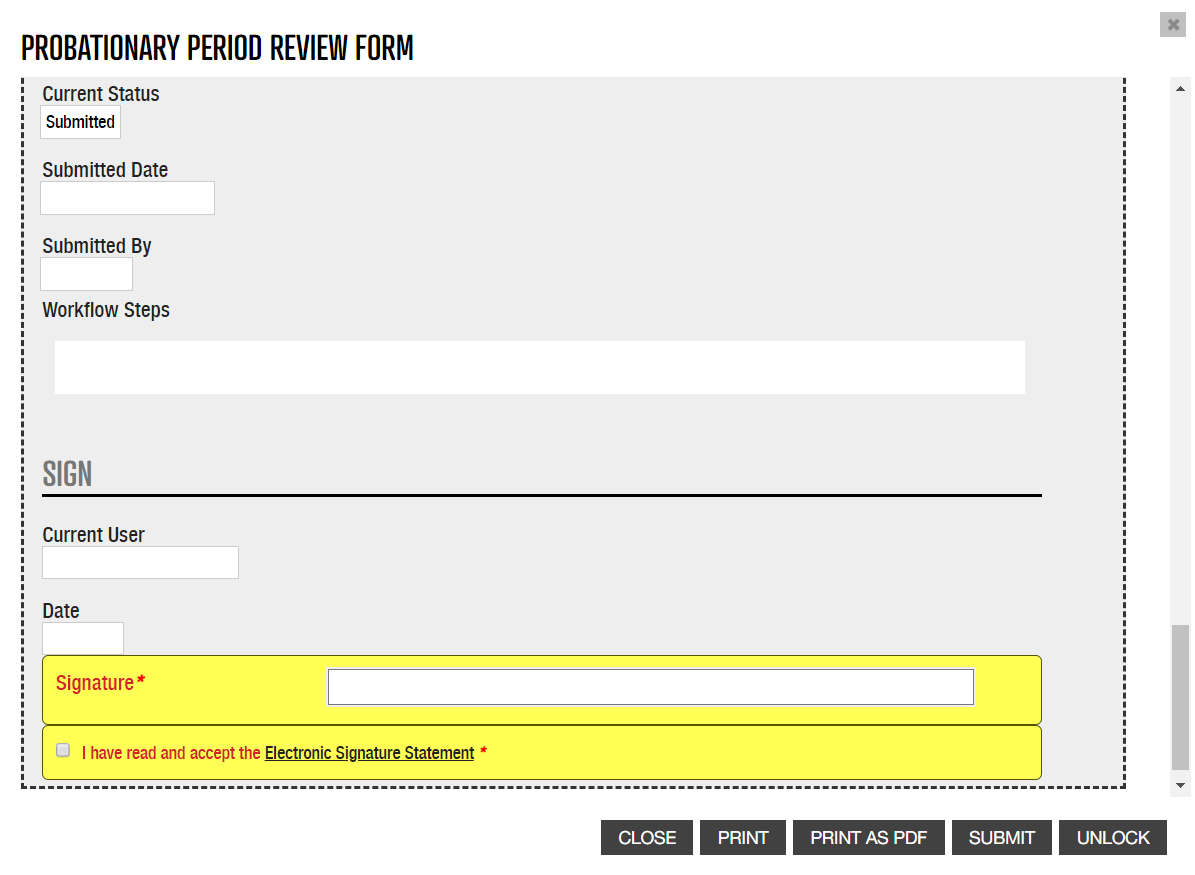
2. Click the Sign/App/Rev button, the form will open in a pop up window. Review the document. To add a signature, scroll to the bottom of the form. The signature field will appear within the workflow section. Sign the form and click the Submit option in the bottom right corner.

1. There are tasks that require completion outside of the Employee Records module. These tasks will appear under the ALL TASKS list. These tasks will be listed with corresponding employee information. The action column will denote a “Mark as Done” button. Once this button is clicked, the task will be removed from your queue and filed under the Completed tab.
2. Tasks that provide instructions will have a “View” button under the Actions column. Click the View button and the task instructions will appear in a pop up window.
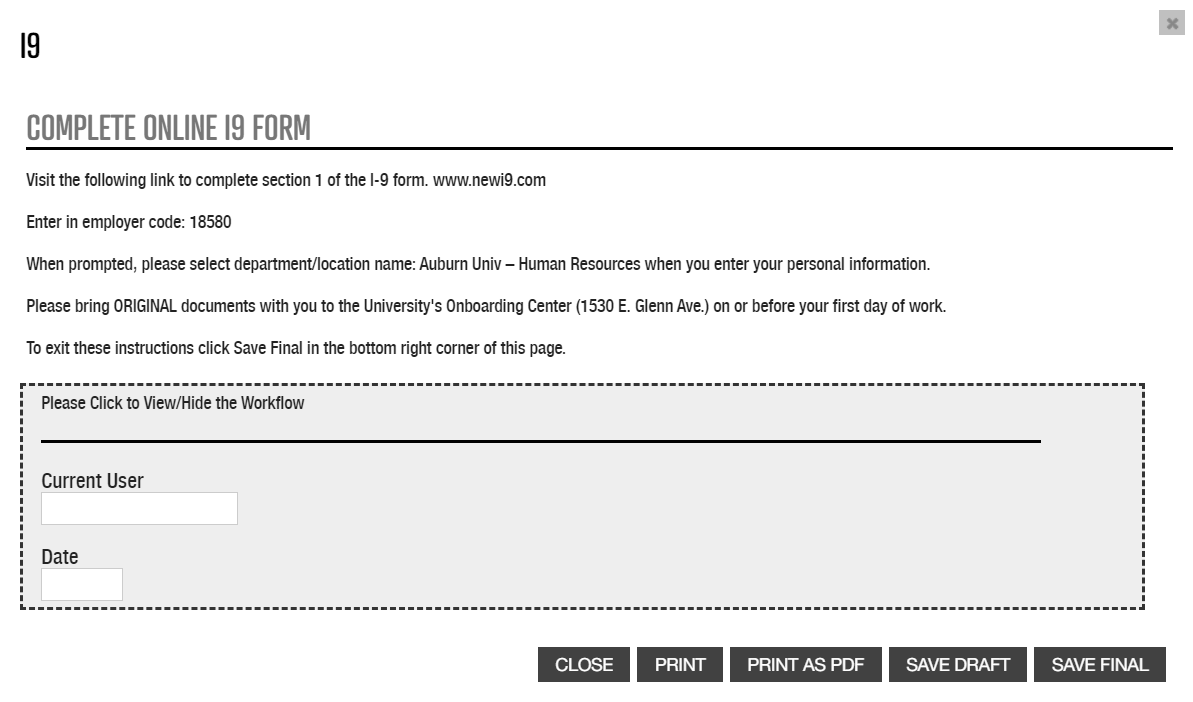
3. Once the specified actions have been taken, click the “Save Final” button in the bottom right corner of the form. The task will be moved to the Completed tab.
If you are unable to complete the requested actions and would like to return to the instructions at a later time, you may click either “Close” or “Save Draft” button. The task will be returned to the Needs Attention tab.
The Employee Checklist Dashboard allows you to view the completion status of employees’ assigned tasks within a respective checklist. To navigate to an employee’s checklist dashboard complete the following actions:
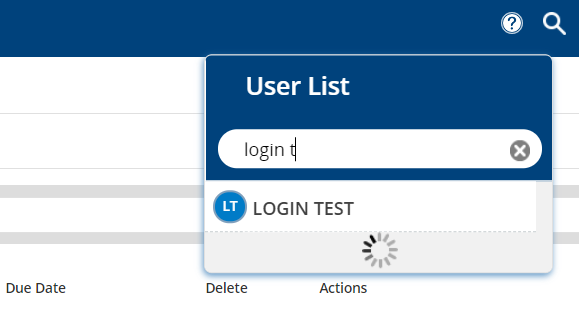
1. At the top right corner of the homepage screen click the magnifying glass icon. A search field will appear, type in the employee’s name you would like to access. You also have the option to search through the list of employees that display.
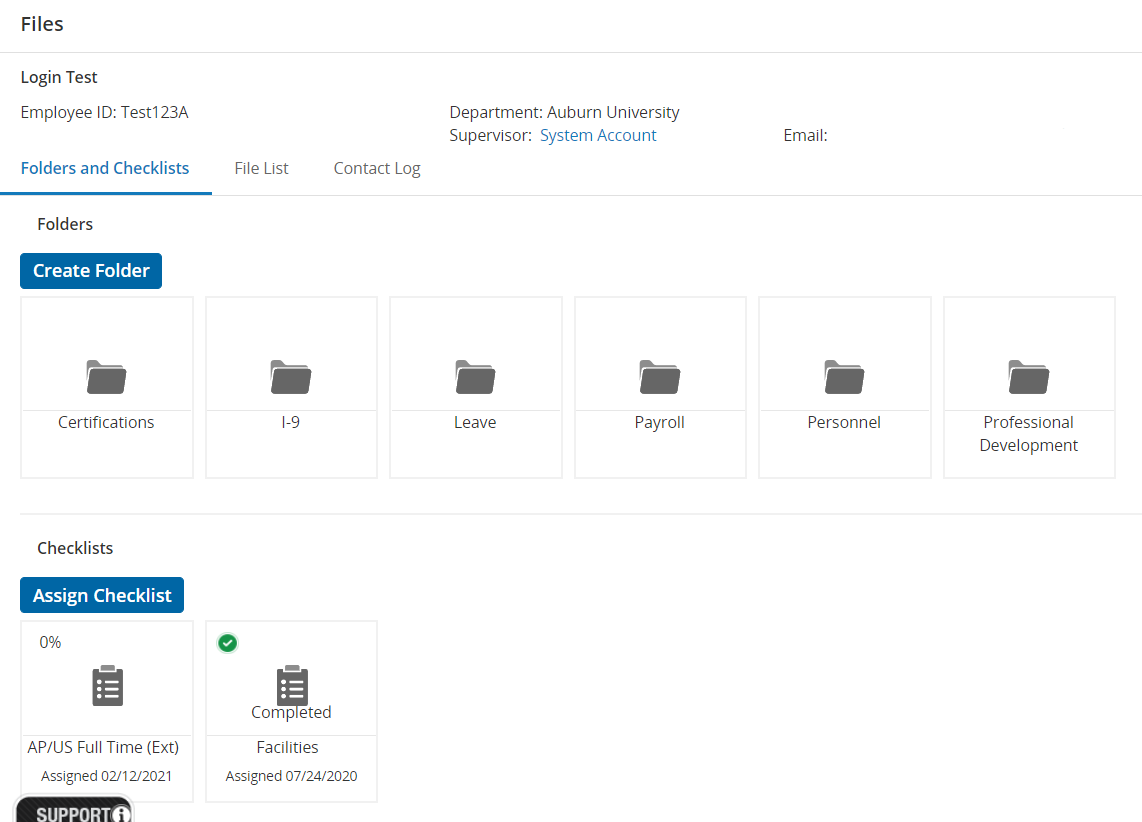
2. The employee’s name should appear under the search bar. Click on the employee’s name. The employee’s profile should open. Verify that you have accessed the appropriate employee’s profile by confirming their name in bold at the top left corner of the screen.”
Under the Folders and Checklists tab, the Folders heading should display. There are two views for this page. It can display in a block format as well as a list format.
To alternate between views, simply switch between “Folders and Checklists” and “File List” options at the top of the screen.

3. Under the block format, assigned checklists will display. The title of the checklist along with a completion percentage should appear. Checklists that have 100% completion will indicate “COMPLETE” and will also have a check mark in the top left corner of the checklist box.
Under the list format, documents will display line by line with associated status, folder, and respective sleeve. You can view documents that have been created (in process) and those that have been completed.
The list view only corresponds to document completion, whereas the block view provides comprehensive details related to the employee’s completion of all tasks that have been assigned.
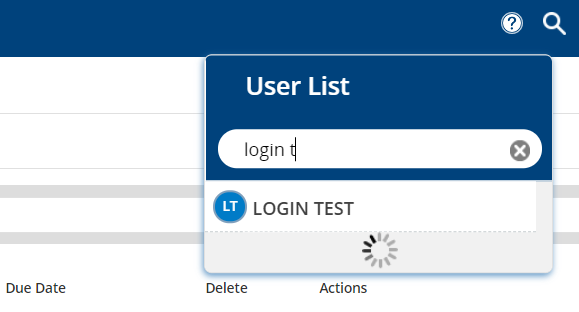
1. At the top right corner of the homepage screen click the magnifying glass icon. A search field will appear, type in the employee’s name you would like to access. You also have the option to search through the list of employees that display.

2. The employee’s name should appear under the search bar. Click on the employee’s name. The employee’s profile should open. Verify that you have accessed the appropriate employee’s profile by confirming their name in bold at the top left corner of the screen.
Under the Folders and Checklists tab, the Folders heading should display. Please note that some file folders may be restricted to various user groups and may not appear.
The Payroll file folder includes documents such as federal, state, and local tax forms.
The Personnel file folder includes documents such as the Personal Data Form, New Employee Handbook Location Acknowledgement Form, and Probationary Period Review Form.
The professional development file folder is not currently being utilized for any HR related documents. Please notify an Onboarding or TES specialist if there are departmental documents that can be stored in this file folder for your respective area.
The Resources file folder includes any documents that the employee would need to reference throughout their first year of employment. Please notify an Onboarding or TES specialist if there are any resources specific to your department that should be included in this area.

1. Once documents are completed by an employee they will enter into an “IN WORKFLOW” status. To track the workflow process you will navigate to the employee’s file folder.
At the top right corner of the homepage screen click the magnifying glass icon. A search field will appear; type in the employee’s name you would like to access. You also have the option to search through the list of employees that display.
The employee’s name should appear under the search bar. Click on the employee’s name. The employee’s profile should open. Verify that you have accessed the appropriate employee’s profile by confirming their name in bold at the top left corner of the screen.
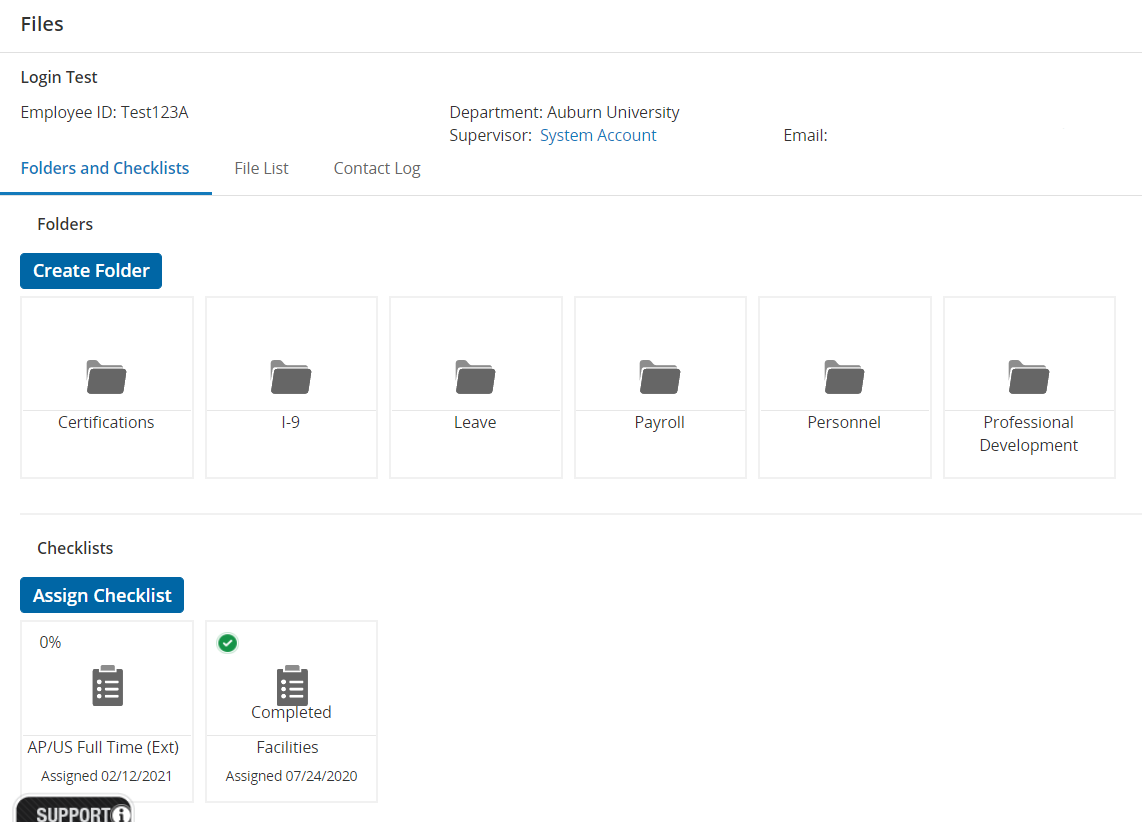
2. Under the Folders and Checklists tab, the Folders heading should display. Within each respective file folder a list of document sleeves will appear. Please note that some file folders may be restricted to various user groups and may not display.
Documents that have fully completed the workflow process will display an open document sleeve with a document inside. To access the completed document click the document sleeve and the document will display. The document can be printed, if needed from this view.
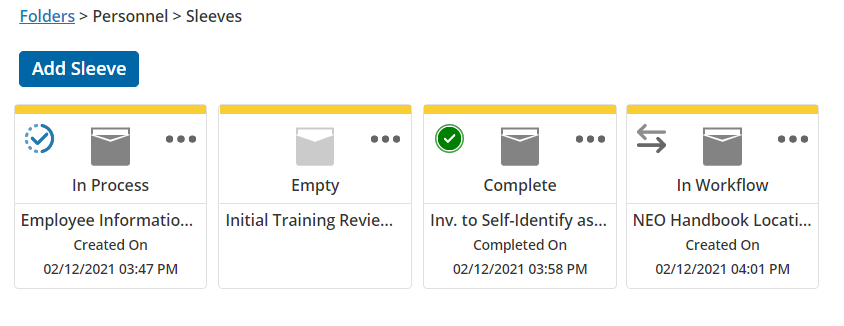
3. Documents that have been completed by the employee but do not display in the designated document sleeve have entered into an “IN WORKFLOW” status. The “IN WORKFLOW” state will appear at the top of the folder. An icon with intersecting arrows will appear above the document sleeve name.
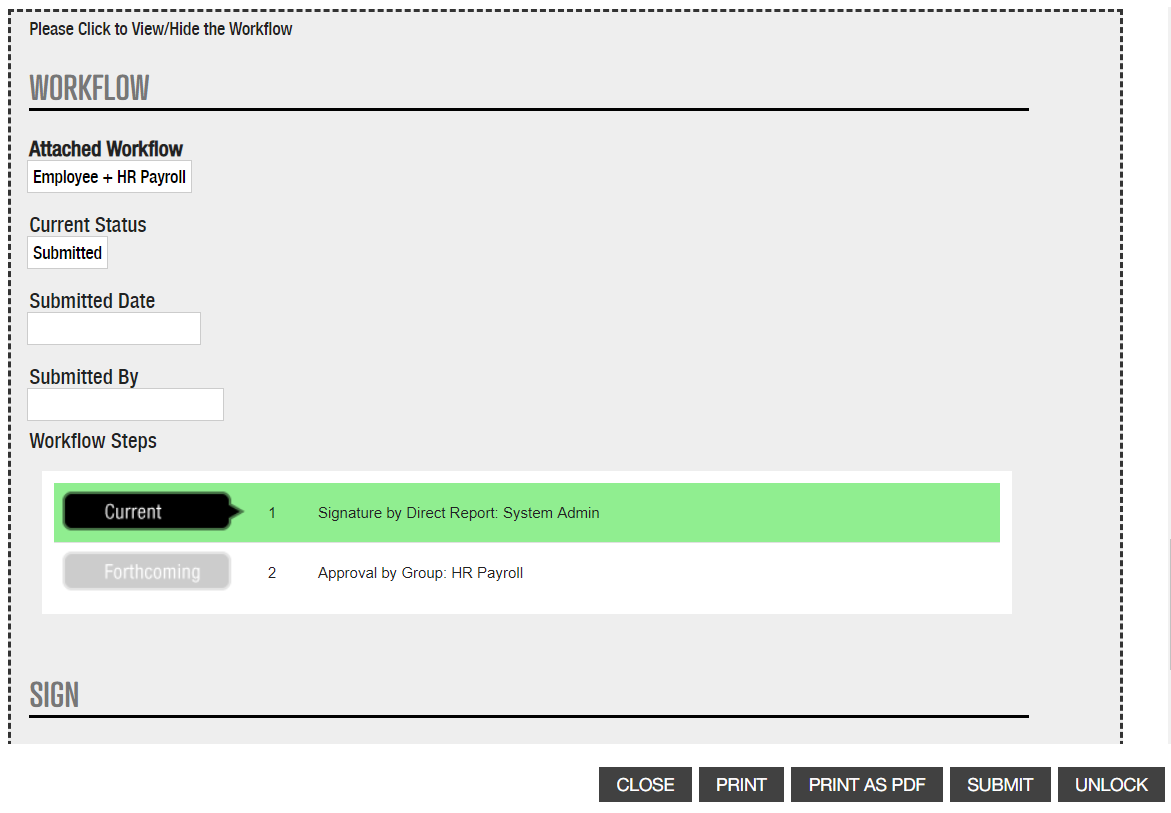
4. You may review the submitted document by clicking the document sleeve. The document should open and allow you to print, if needed.
The document’s workflow will appear in a large gray box at the bottom of the form.
The workflow status will display whether the document has been “Submitted” or “In Process”. If the document has been submitted, the workflow status will also indicate the time and date of the submission as well as by whom the form was submitted by.
Documents that display a status of “In Process” indicate that the document has been started by the employee but has been saved in a draft version.
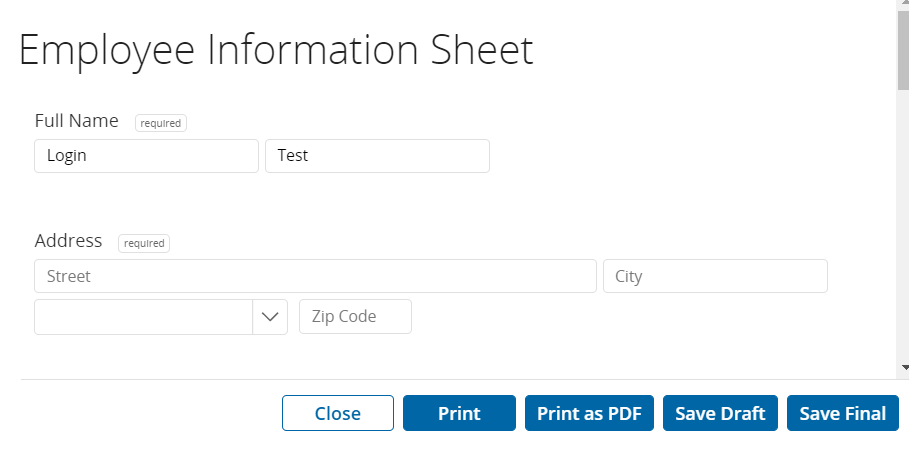
5. Employees have the ability to start and save documents to return to at a later time. In order for these documents to continue through the workflow, they must “Save Final” draft.
There are three workflow processes that can be attached to a document.
Each step within a workflow will display a corresponding state: Current, Forthcoming, Revision Requested, or Complete. Completed steps will display with user details and timestamps.

6. You can expand and collapse the workflow state by clicking the “Please click to View/Hide the Workflow” option at the top left corner of the workflow box.
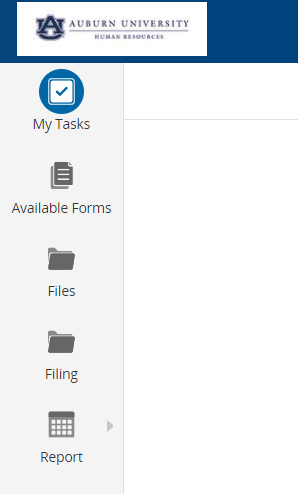
1. To quickly access tasks that need your attention, reference the menu bar along the left side of the screen. Select the icon with the checkmark that indicates “My Tasks.”

2. Tasks that require a signature, approval, or review will display. To take action on a specified task, click the "Sign/App/Rev" button under the Actions column.
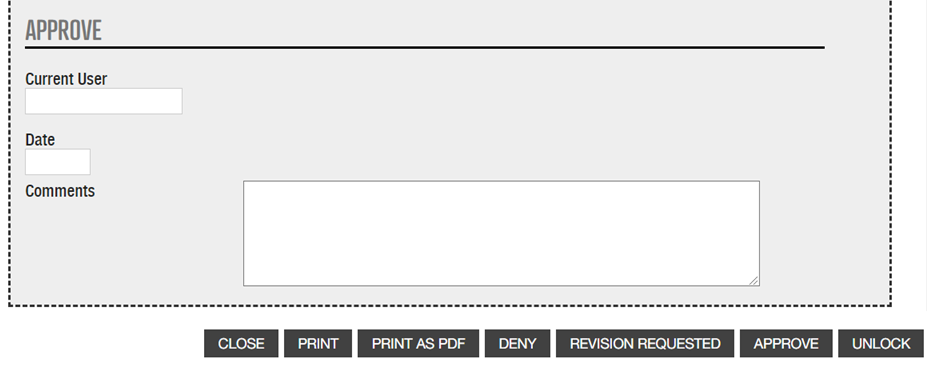
3. The document will display. After reviewing the document in its entirety, you will have the following options:

There are two options to request a document revision.
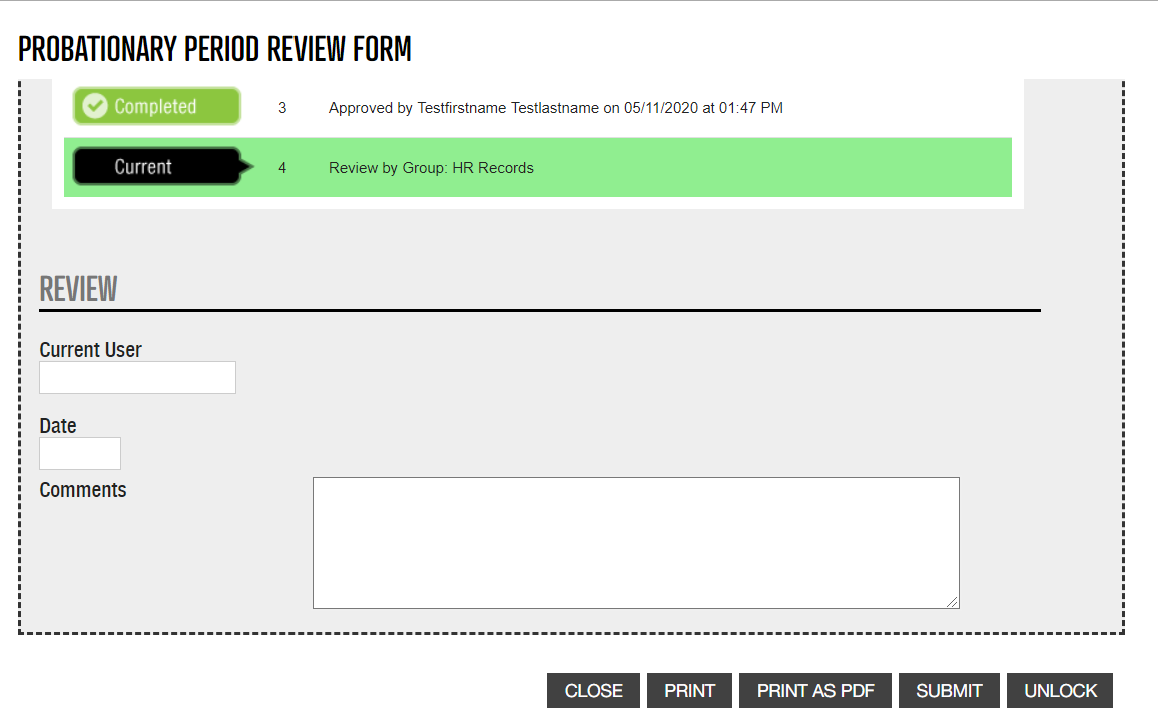
Documents that require your review but no action will still offer you several options.
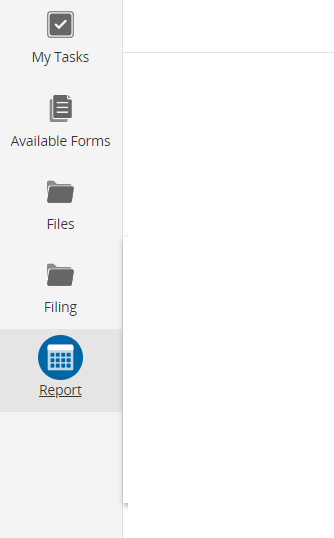
There are several reporting options within the Employee Records Module. To access the Reporting feature, select the Reports icon from the menu bar along the left side of the screen. A drop down tab will appear to select the report of your choice. All reports can be retrieved and exported in to an excel document. The export button will appear in the top right corner of the report.
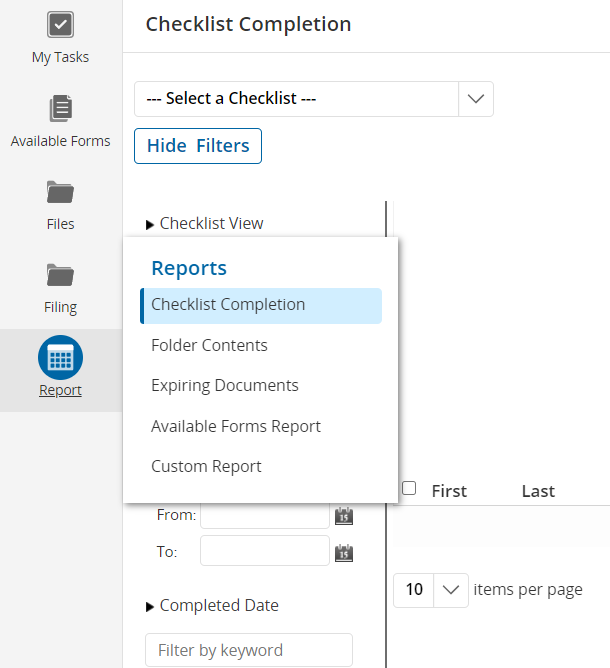
To easily track employees’ completion of tasks, a checklist completion report can be retrieved.
You may change the number of items that will appear on the page by clicking the drop-down box which corresponds with this option.
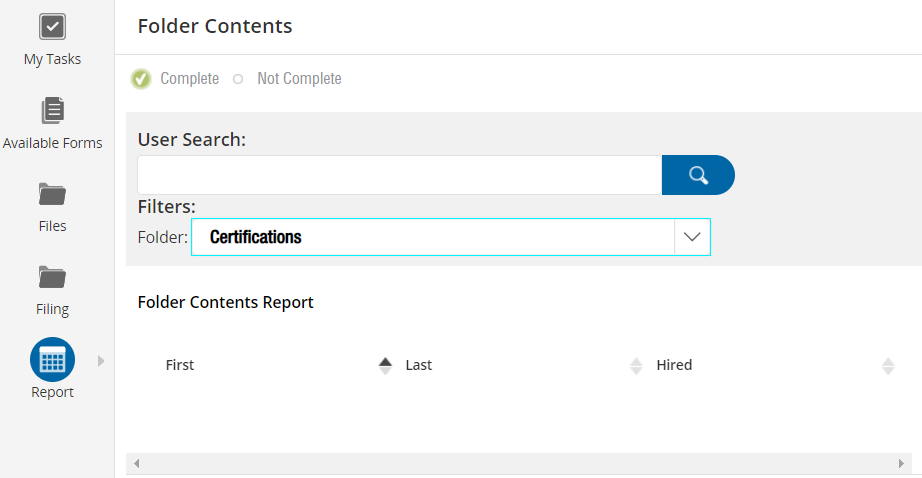
A user may desire to retrieve a report related to the completion of documents within a respective folder. The search can be filtered by User or Folder. All folder contents will appear and indicate whether a respective employee has completed the document or not.
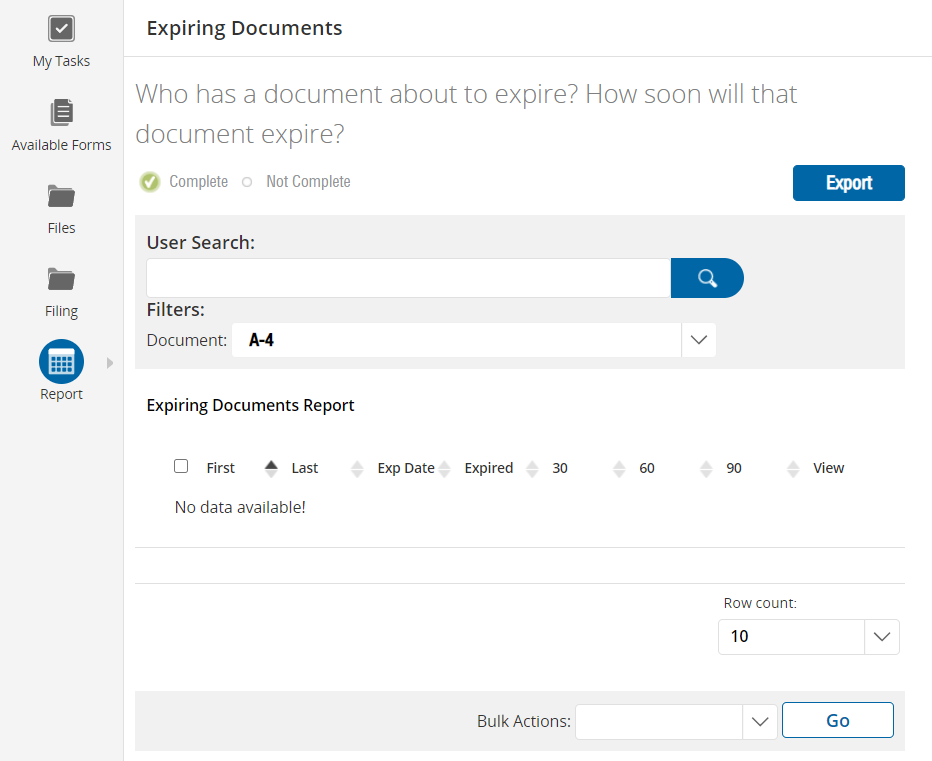
Documents within the Employee Records module can be configured to expire at a specified time point to correspond with the Public Universities of Alabama Records Disposition policy. The Expiring Documents report allows the user to track completion of documents that are scheduled to expire by specific form or user.
Tasks asks that do not require specific actions within the Employee Records module can be completed in bulk.
To complete multiple tasks at once, select the Bulk Actions options at the bottom of the Expiring Documents Report screen. In the drop down menu select “Request Document.”
All tasks that are eligible to be completed in bulk will have a small box along the far left side of the task list. Check each box associated with the individual that you would like to take action on. Once all individuals have been selected, click the “Go” button next to Bulk Actions.
Forms that have been assigned to employees to complete outside of a checklist will be listed under the Forms section of the Blank Documents Report. To retrieve a report for this type of document, click the drop down tab. Select the appropriate form, all employees that have been assigned the form will appear. You may type a specific employee name in the search field to narrow the scope of the report or you may review all employees that are listed.
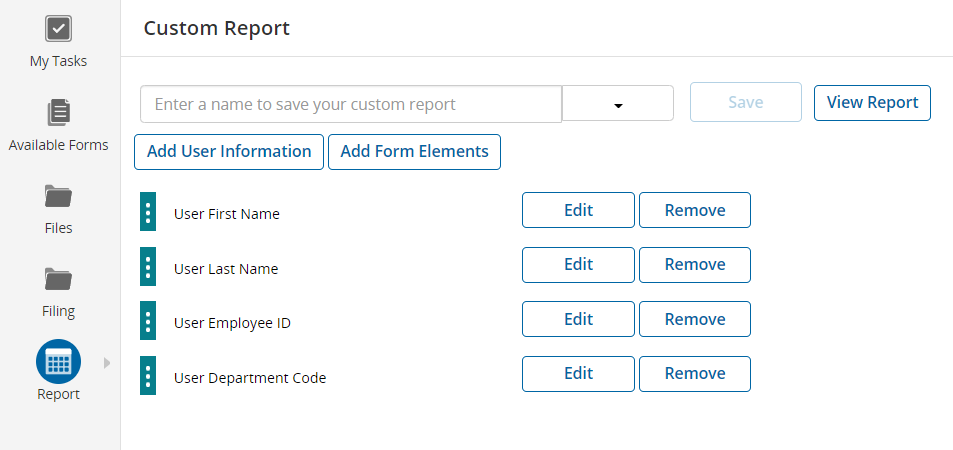
The Custom Report enables the user to manipulate a variety of data points to customize a report. User iInformation will be specified as well as form elements. To add user information select the "User Information" button and select all desired options that appear in the list.
To add form elements select the "Form Elements" button. You will need to specify the checklist as well as the corresponding forms that you would like to retrieve details for.
Once this information has been defined click “Cancel” to start over or “OK” to process the report.

A number of email notifications are automated by the Employee Records module. New hire employees will receive a notification as checklists are assigned to them. When an employee has been assigned a task that requires any subsequent action by you, an email notification is also triggered.
Additionally, the system will send the following:
For questions or help using the system, please email the Onboarding Center or Temporary Employment Services. Visit our Project PeopleAdmin website for additional resources at aub.ie/pa7 and to access the PeopleAdmin Helpdesk to report system issues to our team.